In pop-up book design, the V-fold is one of the most fundamental and expressive mechanisms. With two fold lines extending outward from the spine, it can form a stable three-dimensional structure and support many subjects, including figures, buildings, animals, and decorative forms.
At a 90° opening angle, a V-fold can be divided into two basic types depending on whether the two fold lines are symmetrical: the symmetric V-fold and the asymmetric V-fold. The symmetric structure offers strong stability and visual balance, while the asymmetric structure gives the designer more flexibility in motion, direction, and spatial variation.
Mechanism Category
Primary Category: 90° Mechanism
Core Mechanism: V-Fold Structure / Symmetric Structure / Asymmetric Structure / Basic Pop-Up Mechanism
Design Direction: Pop-Up Book Structure / Pop-Up Card Template / Basic Mechanism Practice
Content Format: Folding Diagram Tutorial / Structural Comparison Guide
Let's fold it together. Here are the step-by-step instructions:
Step-by-Step Guide
Step 1: Prepare the tools and materials
Before building the V-fold structure, prepare the basic tools and paper.
For the material, use 250g paper when possible. Dutch card or another sturdy cardstock is recommended because it has enough stiffness to hold the structure. You can work from a printed V-fold template or draw the structure yourself.
For the tools, prepare scissors or a craft knife, a cutting mat, a scoring tool, a ruler, and glue or double-sided tape. Thin paper may collapse after opening, while overly thick paper can be difficult to fold. A 200g-300g paper range is usually the most suitable for V-fold mechanisms.

Step 2: Draw and build the V-fold structure
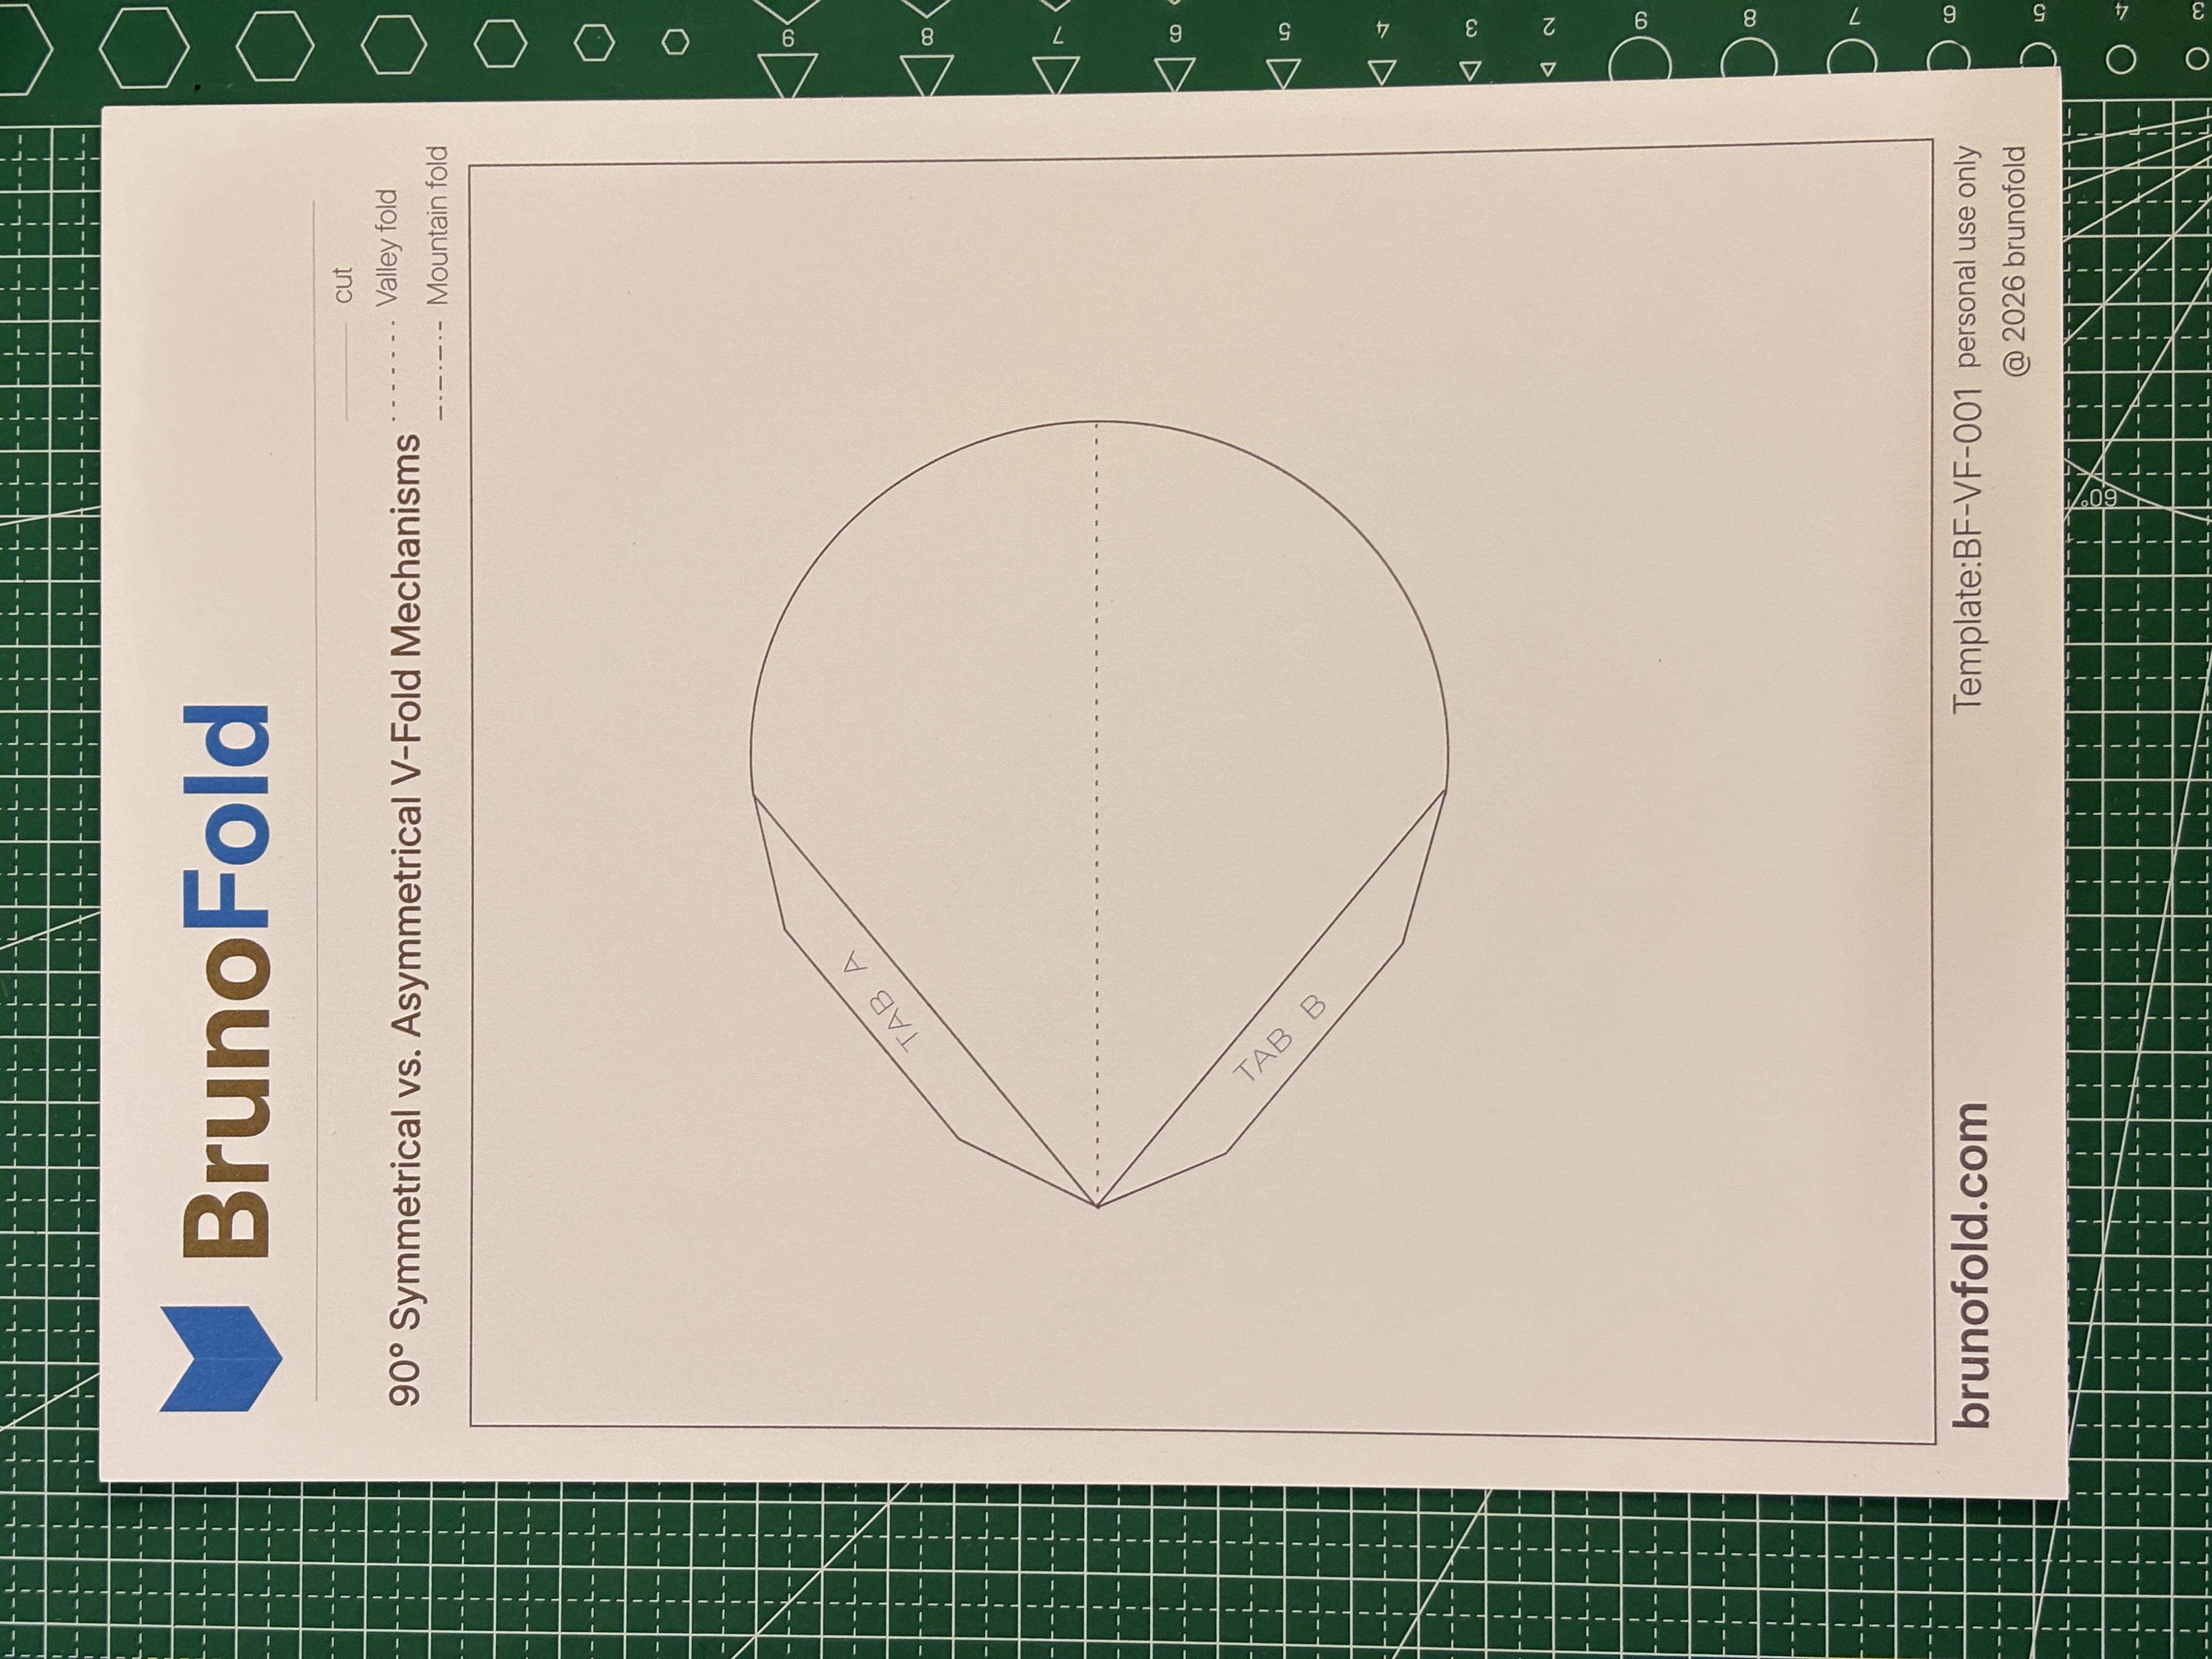
Draw a center fold line in the middle of the paper. This line acts as the spine and becomes the reference for how the mechanism opens.
From the center fold line, draw two V-shaped fold lines. In a symmetric V-fold, both sides use the same angle, so the structure mirrors itself and opens with strong stability. In an asymmetric V-fold, the two sides use different angles, creating tilt, direction, and a more dynamic effect.
Next, design the raised surface between the two fold lines and connect both sides of that surface to the fold lines. All connection points must align accurately with the fold lines, and the structure should not be too long, or it may become difficult to close.
Step 3: Cut, score, fold, and test the motion
Follow the template to build the model. Cut along the outer contour while keeping the connection areas intact. Score the dashed lines so the folds can move cleanly, then fold according to the mountain and valley fold directions.
After folding, test the opening and closing motion. A symmetric structure should open with a balanced, centered result. An asymmetric structure should shift in one direction, giving the finished form a stronger sense of movement and expression.
Common problems include failure to close and stiff movement. If the structure cannot close, the fold angles or connection lengths may be incorrect. If the movement feels stuck, the scoring may not be clear enough, or the paper may be too thick.
Steps 2 and 3 currently use the same visuals as the Chinese page because separate English versions were not provided.
Next Article
180° Symmetric V-Fold Mechanism Guide | Classic Foundational Structure